How to setup load balancer using HAProxy in Ansible


The load balancer distributes incoming application traffic across multiple targets. Load Balancer is also known as frontend or reverse proxy.
The web server is also known as the backend.
The client will connect to the web server through the load balancer one by one means when a client enters the IP of the load balancer then first they connect to Web Server A then next time Web Server B then C then again go to A and this type of algorithm is known as round Robin Algorithm
In backend computers setup webserver
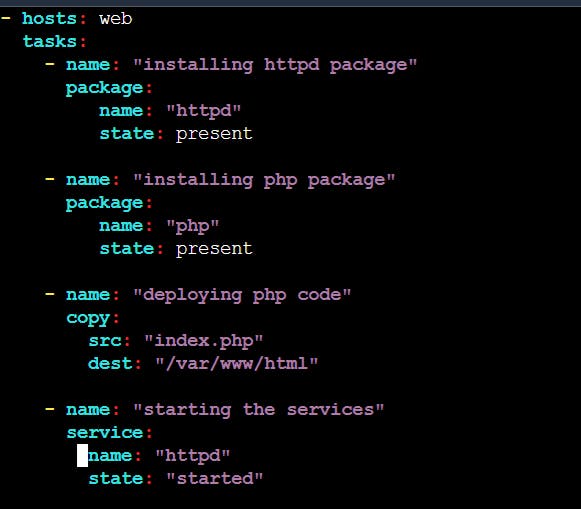
step1: install httpd
install the PHP if you want to put the PHP websites
yum install httpd php -y
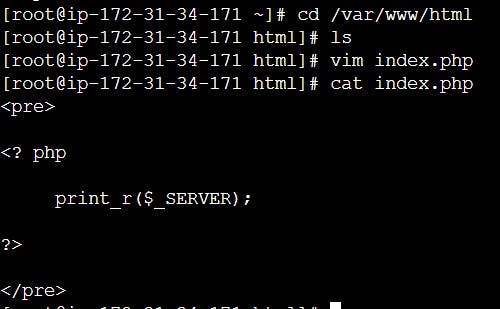
step2: vim /var/www/html/index.php

step3: start the service httpd
now configuring the load balancer
Setup load balancer with 8080 port number and round robin algorithm
frontend will act as a loadbalancer
step1: install the software haproxy
yum install haproxy -y
step2: configeration file of haproxy is in /etc/haproxy
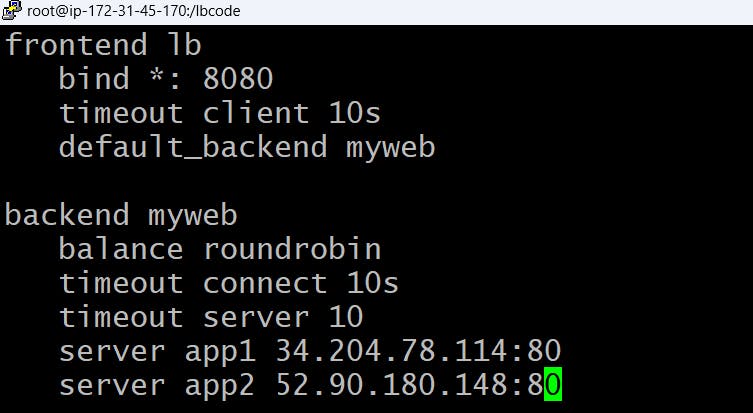
#vim /etc/haproxy/haproxy.cfg
frontend lb
bind *:8080
timeout client 10s
default_backend myweb
backend myweb
balance roundrobin
timeout connect 10s
timeout server 10s
server app1 backendA:80
server app2 backendB:80
now lets do manually
connect the backend servers

lets install httpd and php

step2:
step3: starting the service httpd


same thing we have to do in second backend
now lets configure load balancer in frontend
step1: installing haproxy

step2: config file of haproxy (#vim /etc/haproxy/haproxy.cfg)

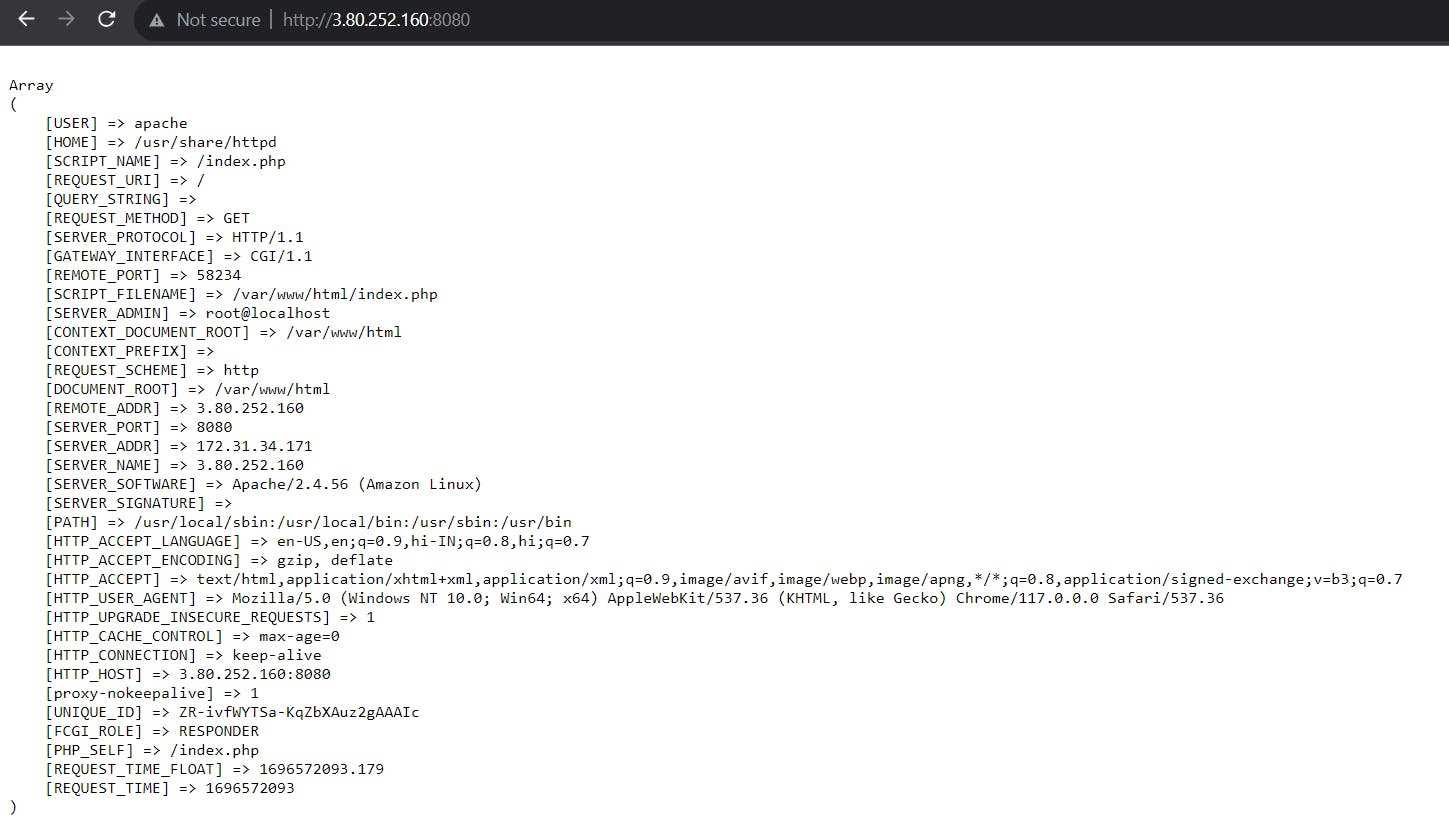
now edit the inbound rule and run the server frontend/loadbalancer in port number 8080
balancing the load in backend server A with ip 172.31.34.171
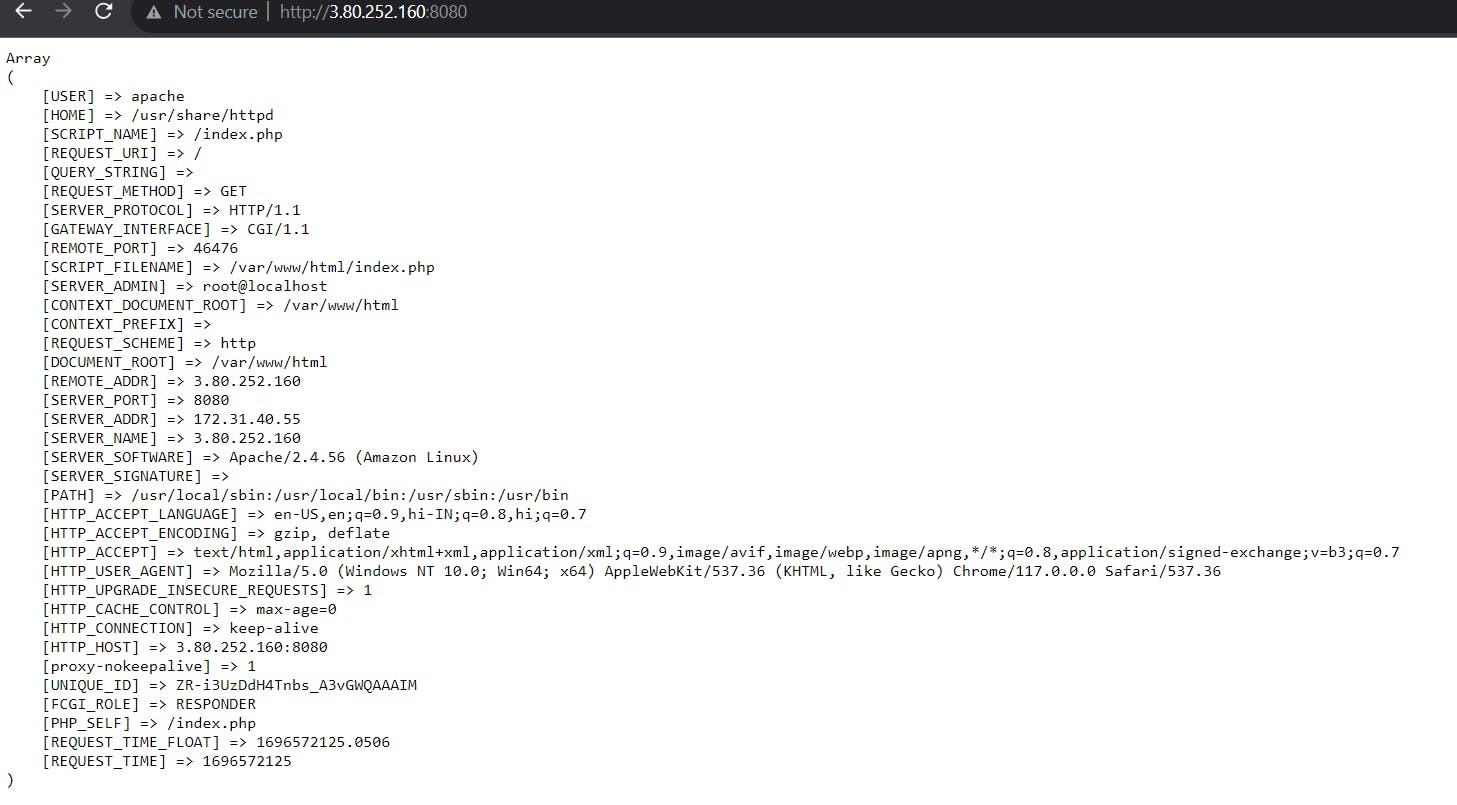
balancing the load in backend server A with ip 172.31.40.55
But if we want to do the things using ansible then we require controller node and target nodes

since load balancer is different computer different setups we have.
we create the one different playbook only for the loadbalancers and other separate playbook for thee webserver.
same thing we have to do while creating the inventory in this we create one host group which contains the ip of backend server and one group of loadbalancer which contains the ip of loadbalancer.
launch the five instance and make one of them as controller node

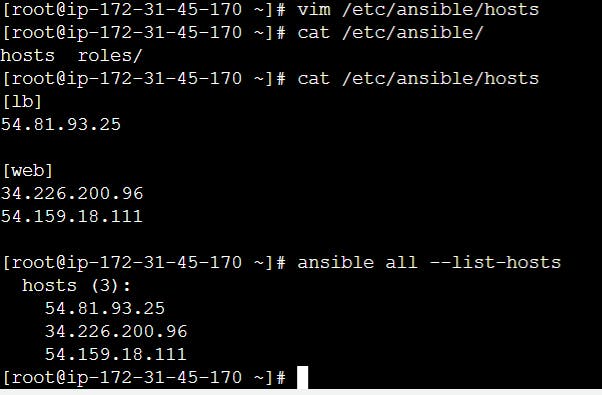
step 1: install ansible in controller node and set the hosts in ansible host config file
create one group for loadbalancer and other for web server( backend server)
now we have to connect the other instance in which loadbalancer and webserver is running.
enable the password authentication in ssh config file (/etc/ssh/sshd_config) copy the key from controller node to loadbalancer node and web nodes to complete the configerations

Templating:
➢Ansible uses Jinja2 templating to enable dynamic expressions and access to variables and use many more programming concepts. Eg. conditions, loops, etc.
jinja2 is a templating language have its own syntax
1)Variables:
If we want to use variable in template file then,
Syntax : {{ variable_name }}
When Playbooks are executed, these variables get replaced by actualvalues defined in Ansible Playbooks.
2)Comments:
If we want to use comment in template file then,
Syntax : {# this is comment #}
3)Conditions:
If we want to use if condition in templatefile then,
Syntax : {% if <condition> %}- - - - block - - - -
{% else %}- - - -block- - - - -{% endif %}
4)Loop:
If we want to use loop in template file then,
Syntax : {% for i in name %}{{ i }}{% endfor %}
When it comes to transferring files to a remote system with Ansible, the copy and template modules are used. Ansible's copy module does exactly what you expect. It copies a file from the local host to a remote server. The template module also copies a file to a remote server, but it allows you to use Jinja2 template
lets configure loadbalancer using ansible

now lets configure playbook of loadbalancer
lb.yml

template file : local.cfg.j2